Quick Start
This guide is designed to assist you with the first steps towards implementing the Cloud Scripting solutions.
To give a try to Cloud Scripting right away, use a basic Hello World application sample, provided below.
And to get up and ready with your own project, fulfill the following requirements:
-
decide upon a scenario that will be delivered by means of CS
-
define a set of properties, essential for the proper application workflow
-
declare the required properties within your JPS manifest file
-
deploy the prepared manifest to a Platform via import functionality
Hello World Manifest Example
Hello World is a simple ready-to-go application that you can use as a start point in exploring Cloud Scripting possibilities.
type: install
name: Hello World!
engine: php5.4

nodes:
  nodeType: apache2
  cloudlets: 16

onInstall:
  deploy:
    archive: http://app.demo.jelastic.com/HelloWorld.zip
    name: Hello World
    context: ROOT
{
  "type": "install",
  "name": "Hello World!",
  "engine": "php5.4",
  "nodes": {
      "nodeType": "apache2",
      "cloudlets": 16
  },
  "onInstall": {
    "deploy": {
      "archive": "http://app.demo.jelastic.com/HelloWorld.zip",
      "name": "Hello World",
      "context": "ROOT"
    }
  }
}
The current manifest states to create a new environment, handled with Apache 2 application server on top of PHP 5.4 engine. After that, the platform will fetch the archive with Hello World app from the specified URL and deploy it to the Apache ROOT context.
How to Deploy CS Solution to Jelastic
In order to give a try to Hello World sample from above (or deploy your own application), enter your Jelastic Platform account and perform the following steps.
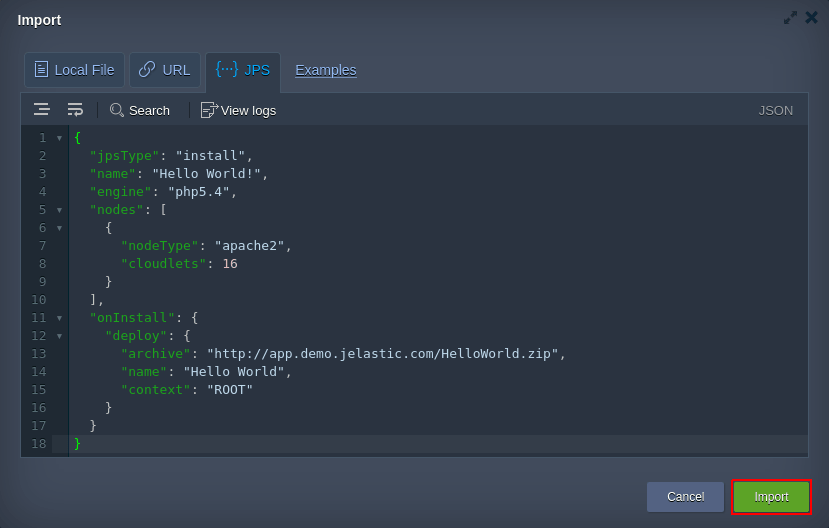
1. Click the Import button at the top pane of the dashboard.

2. Within the opened frame, switch to the JPS tab and paste the code provided above (for Hello World app).
Note
Tip: Subsequently, you can use this editor to adjust your manifest code on a fly. Clicking on the Examples string nearby will redirect you to Jelastic JPS Collection with numerous ready-to-go solutions (just import the link to the appropriate manifest.jps file to fetch the required one). Also, two more options for JPS deployment are available here:
- Local File - to upload the locally stored manifest
- URL - to specify direct link to the required file
To proceed, click on Import in the bottom-right corner.
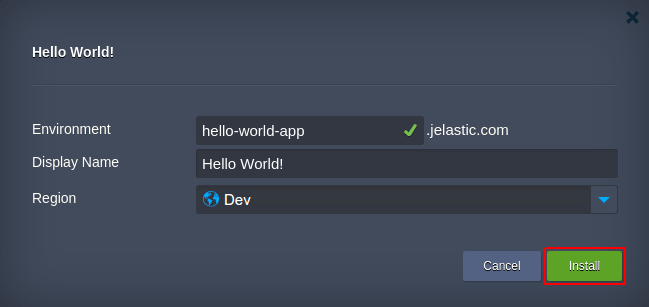
3. Within the installation confirmation window, specify domain name for a new Environment, set a Display Name (i.e. alias) for it and select the preferred region (if available).
4. Once the import is completed, you’ll get notification about successful package installation.
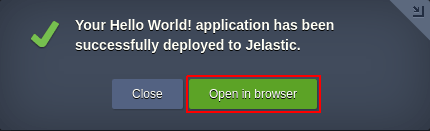
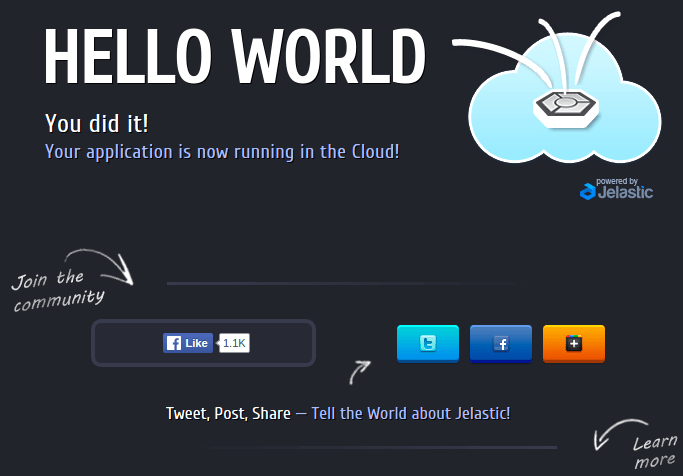
Now you can Open your new environment in a browser and check the result.
Just in the same way, you can build and run the solution you need - from frequent tasks automation to implementing complex CI/CD flows and clustering configurations.
Best Practises
-
For advanced coding possibilities, use either JSON Editor Online with automatic formatting and syntax highlighting or YAML parser (depending on the syntax you prefer to work with)
-
Leverage GitHub to store and manage your projects, manifests and scripts all together
-
Explore Jelastic Samples to benefit on preliminary composed operation and package examples
What’s next?
-
Basic Configs - learn the minimum basis of any JSP manifest and find out about the differences between Install and Update package types
-
Actions - define the required configurations and application behavior with a set of prescribed procedures
-
Custom Scripts - integrate your own scripts, written in either Java, Javascript or PHP, to subsequently execute them within containers
-
Events - automate application workflow by binding actions to particular application lifecycle events
-
Visual Settings - customize your package visual layout
-
Placeholders - specify automatically substituted parameters for the required data to be fetched during installation
-
Troubleshooting - appeal to this guide if you face any issue while working with Cloud Scripting